This is an image of the Cricut Maker.

Cricut Maker Review – my new cutting machine

Posted on

Before purchasing my machine, I read several Cricut Maker Reviews  and I found each of them extremely helpful. In this review I will cover a few things that- even after reading those reviews -surprised me.

My Silhouette Cameo was purchased about 5 years ago. I live in New Zealand and there are no retail supplier of Sillouette products here. I bought my Silhouette Cameo in Australia when we were on a family holiday. We went on a massive road trip up the Sunshine Coast to buy it from a little crafting wherhouse way in the back of beyond.

I have loved my Silluoette Cameo and it has served me very well. When I asked my family if I used the machine a lot they said ‘you use it a lot sometimes” and that would about sum it up. When we are prepping for a party it gets a real work out. I’ve always thought the branding and company experience of Sillouette was excellent. The products are top quality. But the experience hasn’t been perfect. I’ve found the Cameo a bit temperamental at times. I found that getting the blade depth and clean cut right sometimes takes me a fair bit of trial and error.

I was also excited about the possibilities of using the cutting machine for fabric but found doing this on the Cameo was fiddly. The range of materials the machine cuts are a bit limited. Then there was the lack of a local supplier. Everything had to be ordered online and took ages to get to me. All you crafters out there will understand the frustration of having to wait to finish you project.

The last couple of times I’ve used my Cameo it’s been clear it’s starting to show it’s age. There have been some technical glitches which are making it a bit unreliable. So I started to look for a new machine. Spotlight, our local crafting chain, had always been a Cricut supplier. I’d bought my first Cuttlebug from there years before. Cricut’s cartage system and lack of ability to use your own designs at the time had taken it out of the running when I bought my Cameo. Their offerings, I’m pleased to say, have come a long way.

I was looking a the Cricut Explorer when luckily the Maker showed up in the store. It was love at first site. The promise of the range of material that it could cut opened up endless creative possibilities. As soon as the Maker came on sale, I snapped one up. Now here we are- one week later and I’m ready to give you the low down with my Cricut Maker Review.

First impressions of the Cricut Maker

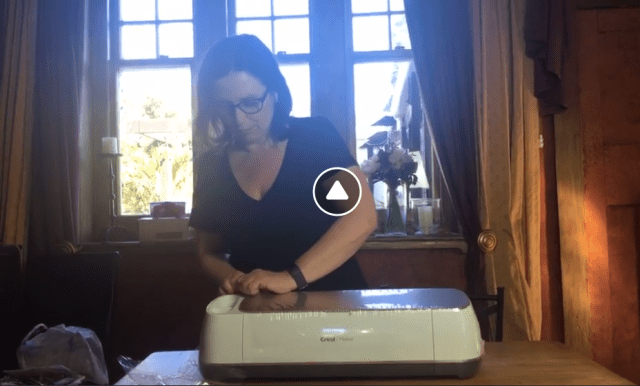
I decided to do a live unboxing video on our Facebook page as hard as it was not to just open it up as soon as I got it. What the Cricut Maker came with in its box wasn’t very clear to me, so here’s what it comes with:

  • Cricut Maker Machine
  • Power cord
  • USB cable
  • Rotary Blade for fabric
  • Fine Cut Blade for paper and card
  • 0.4 Black pen
  • Light grip mat
  • Fabric grip mat
  • Pack of sample materials for your first project

It’s a decent amount of gear to get started with.

Cricut Maker Set-up

I’m one of these jump in and start playing people, rather than a reading the instructions first one, so I initially missed the instructions on the first page of the Welcome Book with the url to set up your Cricut Maker. I was a little stumped at first until I found that. Once I visited the link the set up process was really easy. You have to set up a Cricut Design Space account if you don’t already have one.

One of the cons that I’ve heard about the Cricut Universe is that the only choice is between Software and a Service (SaaS). I’m currently on a 2 week trial and I’m not yet sure what will happen when that expires. I’ll keep you posted. Personally, I find that I’m being bled dry financially by subscriptions. For me, I’m not likely to be using much of the massive library of designs that come with the subscription, as I primarily design my own. This is where, personally, I prefer Silhouette’s model of paying once to own the software.

The software guides you through the set-up as well as your first project. Again, here I didn’t read the instructions properly and used my own materials. The materials supplied had already been put into the settings so it didn’t work as well. The project made a lot more sense once I realised that. I found that I had to run though the project a couple of times, but again this was just me not reading the instructions. Sensing a pattern anyone?

The sample project came out really well. It’s designed to try out the three tools that come with the Cricut Maker. The pen, the rotary fabric blade and the detail blade. The sample project gives you a good run through of each of them. All worked perfectly.

Design Space has a massive number of pre-made projects and I like the tile design of the interface. Each project tile comes with a picture and detailed instructions on what you’ll need which is helpful before starting something. But what I was keen to try was importing my own design into Design Space and see how it handled that. That’s where things got a little interesting.

Cricut Design Space

I’ve been a graphic designer most of my life and worked with design software for decades. I’m afraid to say, I didn’t find Design Space super intuitive. The tools are all fairly straightforward, but I think it’s clearly been designed to make the pre-made designs ahead of designing your own. I tried first importing a simple SVG.

The file imported fine but when I hit the make button the whole design had been rearranged to maximise the material usage which had blown my design apart. That’s great if you’re doing card making or scrapbooking and intend to stick each of those little pieces on by hand. Unfortunately my design was a quote, which I wanted cut exactly as I’d laid it out. I went back to Adobe Illustrator and used the Unite feature in the Pathfinder panel to weld all the pieces that touched together. Then re-imported. That helped a bit. At least the words stayed together!

Finally I resorted to Lorrie Nunemaker’s youTube tutorial to explain to me how to get my design to stay together as a whole. This part of the programme had really stumped me. Not intuitive at all! After watching the video, I found out that for designs to stay together and cut together, they have to be attached. At the bottom right of the Design Space interface is a row of tools that are extremely important to understand for you to get the results you want.

This is an image of the Cricut Design Space tool bar.

The tools are:

  • Slice
  • Weld
  • Attach
  • Flatten
  • Contour

I’m still learning how to use these tools but I’ll show you my understanding of them briefly.

Slice: Breaks overlapping objects up into separate parts that will cut sepearatley.

Weld: Creates one object out of overlapping objects.

This is an image of Cricut Design Space Weld tool.

Attach: Forces objects to cut as a they are laid out on the screen.

Flatten: This is for ‘print and cut’ this will insure that only the outside outline cuts and everything else will print.

Contour: For defining exactly which pieces inside a grouped object cut and don’t.

This is an image of the Contour tool.

Cricut Maker Review Summary

It’s only one week in and I’m really excited about the creative possibilities that my new Cricut Maker will open up. I’ve been watching tutorials on metal engraving and embossing which have me super excited to try. I haven’t had time yet to try everything I would like to but I’m definitely pleased and impressed with the quality and ease of cutting. The process of sending the job to the cutter seems a little simpler than the Silhouette and more often successful using the default settings.

The biggest challenge I’ve had is with the software, and perhaps that’s partly because I’m used to Silhouette Studio. I do like how by default the objects stay in place in Studio and that you can define which shapes cut and score in the layers panel, which was similar to my experience in Adobe Illustrator. However, setting these in the Design Space layers didn’t seem to stick when it came to cutting if the correct action, e.g. attach, hadn’t been applied first. I’ve also found the software a little buggy, hanging on occasion.

I think I’ll also find the font restrictions annoying. When I import my own SVGs is Design Space I’m issued a warning that the text is an unsupported element and dumps it. Even if Design Space had a text field there as a place holder, it would be helpful. Not that helpful when I’m trying to sell a design where the text is a key part of the product, but I guess I’m still trying to work my way around that one! Ultimately though, I’m confident that with a bit more time learning how Design Space works, we’ll be crafting up a storm together.

For SVG cutting files from Printable Party Ideas visit our Easy Store.


sourdough bread

My sourdough bread journey

Posted on

Best sourdough bread recipe ever

King Aurthur sourdough recipe

Sourdough bread has a bit of a cult following at the moment. It’s tangy, complex flavour and crunchy chewy crust make it some of the yummiest bread around but I think part of what makes it so sort after is that it is the antithesis of convenience food. Making sourdough bread at home doesn’t fit well into our modern lives. It’s fickle, messy and time consuming but like most things that take effort and time to master the results are worth it. If you’re new to sour dough bread the yeast used in most modern bread recipes is replaced with a starter that your grow at home.

I’ve been writing this post in my head for months but what has inspired me to finally get it written is making the best and simplest loaf of sourdough bread I’ve ever made. However as my title suggests it has been a journey to get there and I’d like to share some of the things I’ve learnt along the way to hopefully get you to the goal of making great sourdough bread a little quicker.

My first attempt at a sourdough starter was a dismal failure. Not only did I never get an actual loaf of bread made, I’m pretty sure I also created some kind of toxic concoction that would not have done you any good to ingest. It had that pinky/purple hue they all warn you about in the recipes and it smelt BAD!

My version of the BBC sourdough bread.

So what went wrong the first time?

Firstly I think the starter recipe I used first time was too complicated. It contained yoghurt and yeast plus water and flour. Just more ingredients, more chance of it going wrong. Also the dairy element I think made the chance of it going bad more likely.

Secondly I don’t think I approached it with the right mindset. The recipe I used came from a fantastic book which I had tried almost every recipe and they’d been winners. I think I just wanted to try the next recipe and didn’t realise the commitment and dedication sourdough bread making requires. Growing a sourdough starter is a bit like taking on a new pet. Somewhere between cat and seamonkey in it’s level of commitment. In the first couple of weeks it’s more like a newborn baby requiring regular feeding and you have to organise your life around it. Having two small children at the time this was probably just one commitment too many for me a the time.

Second time lucky

Fast forward a few years and all the stars aligned for me to give it another go. What inspired me this time was watching Michael Pollan’s excellent mini series Cooked. In this program Michael Pollan explores how cooking transforms food and shapes our world. The episode titled Air focuses mainly around bread and gluten. This history of this staple of humanity and how recent industrialisation of the bread making process has taken this simple product defined as containing, flour, water, yeast and salt, to containing a list of additives a mile long. He questions whether this change is contributing to the rise of gluten intolerance in western society.


Two things about this episode fascinated me.

1 the discovery of the wild yeasts that eventually resulted in leavened bread. He describes the possible scenario of some ancient human leaving a bowl of wheat porridge out on the table on a warm day long enough for the wild yeasts in the air to begin to grow and multiply. How magical it must have seemed to see that bowl of porridge begin to bubble and grow. This is the closest we’ve ever come to true alchemy. Flour and water transforming to this living growing dough that is greater than the sum of it’s parts. That when cooked transforms to some of the most simply delicious food we ever eat.

2 my sister-in-law has chosen a gluten free diet for health reasons. She was one of my biggest home made bread fans and I also wondered if that was true if there is something in the short cutting of modern bread making that makes it less digestible to people today. There is suggestions that the long fermentation process of sourdough bread making breaks down the gluten making it easier for those with gluten intolerance to digest. However this part I haven’t proven and wouldn’t suggest trying unless your intolerance is only mild.

So this time I had the right motivation. I wanted to replicate the most simple and primal bread making experience and see if with just flour and water I could make my own bread. I’ve got to admit there is a wee tad ‘doomsday prepper’ in my personality. Maybe it’s growing up in the shadow of the cold war but I always feel better when ever I acquire another essential survival skill. If the zombie apocalypse comes I’ll be in high demand.

Another thing I did right this time was give myself time. I took on growing the sourdough starter over the school holidays. I had two weeks on minimal commitments. This is also something that you can do with your kids as a cool science experiment so a good school holiday activity.

I found this very simple recipe for a sourdough starter plus a lot of great tips and step-by-step instructions on the King Arthur flour website. Following their instructions I successfully grew a healthy vigorous starter and made my first loaf of sourdough bread with no added yeast what so ever! It was such a triumphant day, such a sense of accomplishment. I tried a bunch of recipes, both from the King Arthur site and from around the web. I’ll include links to the most successful ones at the bottom of the page. However the business of life took over and my starter got relegated to the fridge and once weekly feedings. Most of the time I was too busy to make bread from the discard so it got chucked down he sink, which seemed a real shame.

We’re currently on another round of saving a budgeting so reinsured to save a little money I thought I’d better start making my own bread again. I had another hunt around the web for a new sourdough bread recipe to try. This time my aim was as simple as possible with a timing that fit well into the daily routine. For those of you unfamiliar with sourdough bread proving the dough takes a lot longer than with added yeast. It’s not uncommon for a recipe to take days to prove. Usually there’s not a lot of hands on time – just a lot of waiting. So you have to plan ahead and you have to time everything backwards so you start your process with enough time to finish at a useful part of the day. When I found this recipe on the BBC good food website I thought I was onto a winner. There were a couple of things I really liked about it. It was simple just starter, flour, honey, salt and water. It used a lot of starter and it fit well with using the discarded starter after feeding so there was no waste. It had a 6-8 hour second proving time which fits perfectly into either a work day or over night. Simply shape and forget. However my first couple of attempts were a bit disappointing. It definitely wasn’t as good as the King Arthur recipe but because of the convenience I stuck with it.

Then I decided to put my mad scientist hat on and experiment. Problems I had found with the recipe were it had a course crumb texture, it didn’t seem to raise much in the oven and was generally just a bit ho-hum in taste. Rereading the recipe I realised I hadn’t been giving my starter long enough to come back to life after being refrigerated. Also I felt though the second raising time length was convienient it seemed too long. I looked like the dough had risen and collapsed in that time so I needed to shorten that. Also to improve the crumb I thought I’d try to add a small amount of gluten flour – obviously if you’re trying to cut your gluten you’d omit this but it with the other changes seems to have made a dramatic difference.

Ingredients

  • 300gms sourdough starter.
  • 220mls warm water
  • 1tbsp honey
  • 1tsp salt
  • 2tbsp gluten flour (optional)
  • 500gms high grade or bread flour.

Method

  1. The day before you want to make your bread take your starter out of the fridge (if that’s where you are keeping it) Reserve your 4oz and feed. Take the remainder and feed with 4oz warm water and 4oz flour. After a couple of hours put your reserved, feed starter back in the fridge and leave the starter that you are going to use to make the bread on the bench in a warmish place, loosely covered until the next day.
  2. If you want to eat your bread for lunch start as early in the morning is you can. Dissolve your starter which will now be hungry again in the warm water. Add the honey and salt and mix. Add the flour and gluten flour and either by hand or with the dough hook of a stand mixer kneed for about 10 minutes. Add more flour or water to get a soft but not sticky dough if necessary.
  3. Cover and leave the dough for 2 – 3 hours. The dough should have risen slightly but may not have done too much.
  4. Knock down and shape into one large round.
  5. Put a clean tea towel into a bowl or proving basket (got to get me one of these) dust liberally with flour and put the shaped dough smooth round side down, seem side up in the bowl.
  6. Oil some cling film and cover. Put in a warm place to rise for 2-3 hours.
  7. Heat the oven to 220c about an hour before you want to eat your bread. Put a large shallow pan filled with water in the bottom of the oven to create steam.
  8. When the oven is hot enough invert your dough gently onto a baking tray after removing the cling film!
  9. With a very sharp knife cut three deep slits in the top of the dough. This will not only give your loaf that traditional sough dough look but it helps the dough underneath expand without being constrained by the skin of the risen dough.
  10. Place in the oven for 40mins.
  11. Bread is cooked when it sounds hollow to tap.

Other recipes

King Authur flour extra tangy sourdough

Breadtopia wholewheat sourdough


Foiling at home with your Silhouette – Tutorial

Posted on

I recently created a logo for a client which lead me to learn a lot about foiling. Now if you’re not familiar with the term I’m referring to spot covering certain aspects of a design with a thin metal coating not foiling your opponent in cheese or a duel or anything quite as dramatic as that.

This has been a technique around in the printing industry for a very long time. Foiling always lends a richness to any design and is associated with quality. Just take a look at your perfume and makeup packages. A lot will use gold foil.

Though it’s a technique that has been around for yonks it’s certainly having a bit of a revival. We are decorating my 10 year olds bedroom at the moment and home deco shops are full with wall art with foiled typography and other accents of the metallic type. It looks cool and the good news is you can do it at home.

Up until recently if you wanted to use this effect you had to go through a professional printer and use an expensive process which involved getting a foil block (like a metal stamp of your design) made then getting the design heat stamped onto your paper. However with the advent of digital foiling there are now cheaper and even DIY options.

There are a couple of ways to achieve the look. I’ll give a brief description of each before going on to demonstrate step by step the method I used.

Foiling using reactive foil and a heat transfer machine.

For this process you’ll need…

  • a specialised machine such as the Heidi Swapp Minc machine or it can be done with a laminator.
  • some sheets of reactive foil
  • your design printed on a laser jet printer NOT ink jet. The toner in the laser jet is what the foil sticks to.

Jennifer McGuire has created an excellent tutorial on the process on YouTube:

Introduction to Heidi Swapp Minc Machines

Foiling using sticky embossing powder

If you’re a stamper you might find this process fun. Using sticky embossing power you can turn any of your stamps into a foiling block!

Tim Holtz Ranger Demo – Sticky Embossing Powder with Foils – CHA 2015

Foiling with a die cutting machine, double sided adhesive and reactive foils

Somewhere along my internet travels I came across this technique. Firstly, I didn’t know double sided adhesive paper existed until a few weeks ago but now I do what a brilliant product. I chose this technique because I have a die cutter and I don’t have a laminator or a Minc machine or for that matter a laser printer.

This technique works well for reasonably chunky designs i.e. largish type. I wouldn’t try it for anything too intricate – that really is where the Minc comes into it’s own.

Materials

  • Silhouette Cameo or personal die cutter
  • Double sided adhesive paper (I found the Silhouette brand worked best)
  • Watercolour paper
  • Inks or watercolours for colouring your background
  • Reactive foil sheets
  1. Create your canvas. I have had this set of Dr Martins watercolour inks since design school. I’ve always loved the vivid colours and the way they blend and merge. I had so much fun creating my background. Of course you can use digital backgrounds for this. There are loads of Photoshop brushes and watercolour background files available if you don’t want to get messy or don’t have these materials on hand but doing it your self is a lot of fun and you can customise the colour to exactly the one you want. I started by wetting my paper with a sponge so that when I applied the inks the paper was ready to soak them in. I also had a water spritzer bottle on hand to spray the ink to get spotty and blend water reactive effects. I choose the ink colours I liked and used sweeping strokes and splats and splotches to apply. Really anything goes here; you just want it to look free and not too over-worked or contrived.IMG_5379-as-Smart-Object-1IMG_5382-as-Smart-Object-1
  2. Using your die cutting machine and your double sided adhesive cut out your design. I used the default setting with the Silhouette brand adhesive paper which worked well. Using some kind of precision tool (mine is always my scalpel). Pick out the backing and adhesive insides of the letters e.g. the inner bit of the p; basically anything you don’t want the foil to stick to. This is a bit of a time consuming task and again here’s where a Minc would be a lot easier. With a bit of patience though, you’ll get there. A good idea to practice on something small first.Double sided adhesive
  3. Once your watercolour background is dry you can start transferring your adhesive letters or design to the background. Do it word at a time if you can and if possible leave the top most paper covering on the adhesive and peel that and the double sided adhesive together off the back most cover paper (the one stuck to the cutting mat). Leaving the top paper on will keep your double sided adhesive clean and maximise it’s stickiness. Use the negative space of the design to check you’re positioning your text correctly by laying it over top of the design as you go.IMG_5388-as-Smart-Object-1
  4. Now the fun part of adding the foil. If you had any parts of the design where the top cover paper came off in the process, do them first. With your reactive foil shiny pretty side up lay it over your adhesive letters or design. Press firmly and rub with the ball of your fist a few times to make sure the foil has stuck and then gently peel away. Foiling IMG_5402-as-Smart-Object-1 IMG_5408-as-Smart-Object-1
  5. Work away uncovering word by word and applying foil as you go. IMG_5410-as-Smart-Object-1

This quote was chosen by my daughter. It’s part of a larger statement but one that I’ve always loved. We’ve included the .svg file free here for you to download and try yourself.

Free download svg file Have fun and happy foiling!

A couple of cautionary notes. Minc foils come with a health warning. I contacted American Crafts and they assured me they are safe to use around children but as you can see in my photos just to be on the safe side I wore gloves while handling the foil and I would always wash my hands thoroughly after using them. Also I wouldn’t recommend using them on anything that is likely to get into the hands of small children who are liable to put thing in their mouths.

Also though I’m no intellectual property expert as far as I have found out quotes published before 1926 are in the public domain so are useable in this kind of situation.


This is an image of pineapple and grape kebabs.

Tips to help you save money on groceries: One year on

Posted on

So a year ago I wrote a post about how to save money on groceries. I thought it would be a good idea to report back on our progress.

In 2014 about 20% of our income was spent on food, both on the weekly groceries plus takeaway meals, coffee’s out, trips to the bakery in the weekend etc. In 2015 we managed to reduce that to 16%. While our aim was to reduce our spending by more than this it’s still resulted in a significant saving. We have managed to save money enough for a modest family holiday or several pieces of furniture or chunk off the mortgage for a couple of examples. Enough to make a difference. At times it was definitely touch and there were budget blow out months. December for instance was atrocious. We hosted Christmas dinner plus had a house guest for a couple of week and all that contributed to a big budget overspend.

2015 has been a big year for us. We have moved from our first home that we’d been in for 15 years to a much larger home with a bigger mortgage. This budget experiment has shown us that if we buckle down there is money to be saved which can give you some added confidence when making big purchases.

So what have we learnt.

  • Our biggest savings came from avoiding take away meals. I learnt to plan ahead if I knew I had a busy week with a lot of after school activities that would make cooking a meal difficult I had to have some quick meals up my sleeve.
  • While most weeks we found we could pretty much keep to our grocery budget occasionally you have to replace a big ticket item like olive oil and this just throws everything out. While I kept our weekly goal low I knew the actual realistic budget after awhile needed to be a little higher than my initial figure. But keeping aiming for the lower figure helped balance the overspend weeks. Just little mind tricks like that can help.
  • My husband has become a bit of a star and huge advocate of the healthy and home made direction the budget has sent us in. His home made muesli has become legendary. My eldest daughter has also stepped up a and her baking is awesome.
  • My daughter also had a healthy lunch box compliment paid to here by her teacher at school.

This is an image of oranges used in the body scrub recipe.

Tips to help you save money on groceries

Posted on

So this is a bit of a departure from our usually party themed posts but great food is part of what we love here at Printable Party Ideas so I thought I’d share some tips I have discovered really work to help you save money on groceries. I think we are pretty typical in that when we sit down to balance the budget we wonder where all the money goes each month. We’re not extravagant dresses, we don’t smoke, we make do with one car and we bought our house a long time ago so our mortgage payments are quite low. So where then does all the money go? Short answer is we eat it! I’ve been tracking our spending quite closely now for about a year and about 20% or our outgoings are on food, and while we all know you can’t do without food, what food we buy and how much we spend on it is somewhat discretionary. I don’t want to come off sounding all Marie Antoinette because I know a lot of people manage on much tighter budgets than we do and you may be already doing all you can but read on and see if any of these suggestions will work for you.

  • Set a baseline. The first step in saving money is knowing where it’s going. I recommend before trying to put any savings in place you just spend normally for a couple of months but take a careful look at where it’s going. Using a budget tracking tool for this can really help. Our bank has a great one online. One of the great things about it is everything goes through the bank account so there’s no additional work having to add transactions in and no way of missing anything. This tool even tells you your average spending in any category then when you set your new budget it will tell how how much that will save you in a year. This can be really motivating, especially if the amount is significant enough. It has to be easy or you just won’t do it. So check out if your bank has a facility like this and if it does definitely take advantage of it.
  • Set a realistic goal and stick to it. Too low and you’ll be miserable and it won’t last so make sure you go for sustainable long term savings that allow you to still have the odd treat. This usually means by the end of your week you have to get a little creative. The key is to make it kind of like a game rather than a hardship. What can I make for dinner out of what’s in the pantry and the freezer? It can result in some rather interesting dinners but it can also be a fun creative challange.
  • Grocery shop online if you can. If you have a supermarket chain in your area that does online shopping – use it! I’ve been doing my grocery shopping online for about 10 years now and it’s by far the easiest way to stick to a budget. Plan your meals according to what’s on special and buy brands that are discounted. You’ll be amazed how that adds up. I saved $50 on my last grocery bill by doing just that. Check your cupboards as you shop so you don’t have any reason to do midweek top up shops. If you do forget something and have to go do a mini shop during the week, stick strictly to a list and make sure the cost of your mini shop is deducted off the next shop so you don’t blow your budget.
  • Buy ingredients, not meals or ready made as much as possible. Stock your pantry, fridge and freezer with basics so your never caught out
Pantry Fridge Freezer
Flour Eggs Frozen Berries
Sugar Milk
Pasta Yoghurt
Rice Cheese
Canned Tomatoes Fresh Fruit and Vegtables
Canned Fruit and Vegetables Butter
Chocolate (yes this is a basic as far as I’m concerned) 😀
Oil
Dried Fruit
  • Bake! Bake cookies for lunch boxes. Bake bread. Bake, Bake, Bake. It takes effort for sure but it’s cheaper and yummier than anything pre-made and you know exactly what your putting into your families bodies.
  • Plan ahead. You’ll probably have to spend an hour or two each weekend baking for the week ahead. If you have left overs freeze them to save yourself time in the future. We all have busy lives these days so make sure you plan easy quick meals for the nights that your home late so you don’t have the excuse of heading to the take out.
  • Cut down on meat and don’t skimp on the fruit and veg. Meat is often the most expensive part of the food bill. Try adding a couple of vegetarian options each week or making meals where the main focus isn’t the meat such as stir fries. Also bacon and salami are your friends here because they pack a big flavour punch for a small quantity.

So we’re about half way into our second month of our new budget. Still early days yet, but so far so good. We’ve survived the back to school test. We’re making our own lucnhes and what’s great is we all agree we are eating much more healthily than before. No one is resenting it – at least not yet and we have more money in the bank account.


This is an image of Rock Candy.

Rock Candy tips and tricks

Posted on

Despite it begin the current dietary bad guy you just can’t deny what an amazing substance sugar is. Even if you forget about the taste we all love, purely as a creative material in cooking it’s versatility is incredible. You can even use sugar to learn about the science of crystals. What more could you ask for than running a science project that in the end you can eat the results. I also think rock candy sticks are wonderfully pretty to look at and photograph and I had a lot of fun with that. Growing rock candy may test the patience of younger children but if there’s just a little bit of OCD in any of you parents, like me, you will love this process.

The rock candy recipe

  • 1 part water
  • 3 parts sugar
  • Wooden skewers
  • Tall thin glasses or jars
  • Food coloring and flavouring if desired.
  • Clothes pegs or large bull dog clips for suspending the skewers over the glasses/jars

The ingredients couldn’t be simpler but as always working with sugar can be both tricky and dangerous when it gets hot, so the first stage definitely requires adult supervision. All recipes call for one part water to two to three parts sugar. So if you had one cup of water you’d need two to three cups of sugar. Basically the more sugar you can dissolve into the water the better – though there is a catch – if you add too much sugar and do too much stirring your sugar syrup may crystallise in the pan. This is want you don’t want and the major omission that I found in all the tutorials I read. Obviously the more sugar and water you use the more rock candy you can make but I’d suggest starting with 1 cup water: 3 cups sugar for your first batch until you have the method working so as not to waste too much sugar.

Method

Wet your skewers and roll them in sugar and hang them to dry in the jars. The sugar on the skewers provides a ‘seed’ for the crystal growth. Do this as far in advance as you can. If you get nice and evenly coated skewers you should get nice even crystal growth, but they need time to dry so they don’t wash straight off when you put the skewers into the solution.

Add one cup of water and three cups of sugar to a heavy based pan.

Bring to the boil over a medium high heat stirring UNTIL the syrup boils. As soon as it boils STOP STIRRING. Bring to a rolling boil and then take off the heat. This should only take a couple of minutes. The rest of the sugar should now be dissolved. You should end up with a clear, thick liquid.

We put different colouring in each glass so we ended up with 5 different colours. It’s up to you if you want to make them all the same. If you want a different colour for each you can put a few drops of colouring (concentrated gel is best) in the bottom of each glass

Allow your syrup to cool for 15 to 20 minutes and warm your glasses to avoid the hot liquid cracking them. Carefully pour in your hot syrup to the top mixing the colouring as you go.

Lower your sugar seeded skewers into the liquid. Depending on the size of your glass/jar you will be able to fit either one or two in each. Make sure the skewers don’t touch the bottom or sides of the container.

Put the containers in a warm sunny places where they won’t be disturbed and loosely cover with a kitchen towel if you have dust or bugs to worry about – and wait!

Within a day or two you should start to see some growth. If you start to find a sugar skin start to form on the surface of the liquid or crystals form at the bottom of the container it’s a good idea to pour the liquid into a fresh container. Use a sieve to remove and chunks of sugar floating around. Do this once a day at the most.

It should take about a week to grow some decent sized crystals.

The science

So this is all great fun and produces some yummy results but we’re also here to learn something right! Now I only studied chemistry as far as high school so I’m no expert but again thank goodness for all the helpful people out there in cyberspace all the answers are there.

So what’s happening is when we melt the sugar in the water we are creating a SUPER SATURATED liquid which is essentially unstable and the sugar can not stay dissolved in the solution once it cools. As the liquid cools the sugar comes out of the solution it is forming a precipitate, in the form of sugar crystals and the method is called precipitation. The other effect that makes the crystals grow is evaporation – over time the water evaporates from the solution again increasing the saturation of sugar in the solution and encourages the sugar molecules to collect on your stick.

Molecular bonds are soft with relatively low melting points. Rock candy sugar crystals are made from molecular bonds (there are other types of bonds in crystals such as ionic in salt) and they grow molecule by molecule on the stick.  There may be as many as a quadrillion molecules attached to your stick when they are fully grown.

Links

Here are some of the useful websites that helped us with our rock candy plus some science sites for further reading.

About.com

Middle school chemistry

Video Tutorial

Science Bob


Pirate Ship Cake

Posted on

Want to make a pirate ship cake for your next party?

Here’s some photos of ours under construction plus some tips on decorations and supplies you might need.

This is an image of the pirate ship cake base.

First the cake pan – we used a Nordic Ware Pro Cast pan that we hired from a local cake shop but you can purchase one from Amazon. This takes a lot of the hassle out of getting the ship-shape right. But what we did do was turn the finished cake upside down. We felt it had a more traditional galleon shape that way. If you do this you will need to bake a second smaller cake to add some decking and cabin to the top of the cake.

Once you have your shape right cover with chocolate frosting. Using a fondant marking tool or anything sharp and pointy draw plank lines around the cake and wiggly lines for wood grain.

Use chocolate fingers to build the deck railing and bowsprit.
This is an image of the pirate ship cake with chocolate fingers.

We used Wilton piping gel tinted with aqua colouring for the water. This stuff is amazing and you actually don’t need that much. Spread on your cake board thinly with a spatular. Add some sea foam if you like with some aqua butter cream frosting. Use some parchment coloured paper for your sails – we printed ours with a birthday message. Thread them onto a long wooden dowel for a mast. My daughter helped me to model some cute details with coloured fondant like the crows nest, treasure chest and sharks fins in the water. Pipe some details like the anchor and portholes with dark chocolate frosting. Top it all off with a jolly roger flag.
This is an image of the finished pirate ship cake.

Arrrr me hearties that be a great pirate ship cake!

Don’t forget you can download matching pirate printables from our Etsy shop.

This is an image of Pirate Party prinables.


This is an image of Glow in the Dark Balloons.

Glow in the Dark Party Ideas

Posted on

Glow in the Dark Party Ideas – things you need to know!

My daughter has wanted to have a Glow in the Dark party since she was small. But first we had to exhaust all those little girl party themes, you know Dora, Princesses etc, now turning 11 we decided to revisit the idea. As kids get older it gets harder and harder to pick a theme they approve of and I’ve got to say this one is perfect for Tweens.

Firstly this is a theme that requires quite a bit of planning and preparation. The first thing you should do is purchase a blacklight torch. We got these small inexpensive ones from Amazon for $7.25 each. Get as many as you can afford as they come in handy for party activities and extra lights for photography. Once you have your torch pop it in your handbag and take it everywhere you go. Why, it’s your Glow in the Darkness tester. When you are out shopping for paint, card, nail polish, or whatever, check with the torch if it really does Glow in the Dark. Many products that look like they should don’t.

Secondly you will probably need to hire a blacklight. So check out local party hire companies and book it in for your party date. We hired two of the tube type which are preferable to the bulbs. That took care of our hall way and the room the kids were dancing in. Basically the more blacklight the better so if you want to blackout more of your house you will need more.

Now start gathering your products. We are based in New Zealand so we had to order a lot of things online. We got all our plates, cups, glow sticks and facepaint from various vendors on Amazon. Have a look at our Neon Glow in the Dark Pinterest board to see the full list of products and suppliers we used. Make sure you read reviews and check anything you buy does really glow under blacklight. All the products we used worked great!

Choose your blackout space, a room with few windows will be easiest. We emptied one room out and hung up black polythene over the windows and on the walls as decoration. Then we hung a polythene curtain in our hall way so the room stayed completely dark even when the front door was opened. In the entrance way we had a disco ball to make a great entrance.

Decoration Ideas

  • Glow in the dark balloons – these look amazing in the blacklight.
  • Neon chandelier – cut strips of neon colored fabric and tie to a hula hoop then suspend from the ceiling in the party room.
  • Black paper or polythene – splatter black paper or polythene with Glow in the Dark paint or stick on neon sticky notes or shapes cut out of neon colored paper.

Activities

With this theme there are a heap of fun possibilities. Here’s what we did…

  • UV face-painting and Glow in the dark nail polish – a good idea to do this when kids arrive so they are painted up for the photos.
  • Glow Stick Party Pack – this pack had a heap of Glow Sticks and a bunch of different connectors so you could make ear rings, brackets, bunny ears or sunglasses and kept the guest busy for quite awhile.
  • Dancing – you can get some great light painting photos with the kids dancing, playing with Glow in the dark Balloons adorned with their glow sticks.
  • Glow in the dark scavenger hunt – this does require a bit of pre-planing but is a lot of fun and here’s where your blacklight torches come in.

Menu

It’s a little hard to think of Glow in the Dark food without striking fears of toxic, radioactive, fish with three eyes like you see on the Simpsons. However just like white t-shirts just glow under blacklight some foods do too. I was tempted to buy some glow in the dark food coloring that I’d seen but ended up using UV food glitter to give some of the food the extra glow. As this was an evening party we kept the food pretty simple.

  • Topsy Turvy Splat Cake
  • Twisties – these are an Antipodean delicacy but I’m confident you can find a replacement glowing cheese snack in your neck of the woods.
  • Sugar Cookies with electric colored icing.
  • CakePops

Things to remember

Don’t forget to tell your guests to come dressed in Neon colors and white. This is a party that works much better after dark.

Don’t forget to check out the photo gallery

Printables for the party can be purchased from our Etsy shop

Credits

Thanks to the Hopkins family for their Disco Ball delivery and installation service and the awesome photos.

We were inspired by the Neon Glow-in-the-dark party featured on Kara’s party ideas recently. This is a fabulous looking party but we think we’ve put our own unique spin on it.

Another source I’d like to credit is this article BRIGHT Ideas for a Blacklight Glow Party. This is a great article which gave lots of fabulous advice which you should definitely check out.


Surviving a sleepover party

Posted on

Sleepover party ideas

IMG_6841

If you’re like me when your child asks for their birthday party to be a sleepover party your blood runs cold and you have nightmare visions of being kept awake all night by screaming or giggling or fighting or crying or any combination of the latter.

Now I don’t want to put a hoo doo on my luck with sleepover parties but so far I’ve hosted two pretty successful ones that have by no means lived up to the horror I was expecting.

I thought maybe I could share some of the ideas that have helped save my sanity and kept everyone happy.

Have a bolt hole room

Even if it means the siblings have to go stay with a friend or relative, clear out a spare room. This room can be used either to isolate the trouble makers i.e. the kids who just can’t stop talking when all the others want to go to sleep or for the kids who really want to go to sleep and all the rest don’t . Even the threat of splitting up the gang can help keep things under control.

Collect contact detail and important information before parents leave

Have a piece of paper and pen by the door so you can jot down contact no’s of any parents you don’t know too well as well as any health conditions or allergies that you have to be aware of.

Have food and drink on tap

Make the food grazing rather than a sit down affair. For our Popcorn and PJs party we set up a concession stand just like at the movies. Kids were allocated tickets so they didn’t OD on sugar or fight about who had the most candy bars and they swapped them for food. They loved being able to browse and decide what they were swapping their tickets for items anytime through the movie.

This is an image of a Concession stand.

Concession stand

Too much of a good thing

Keep drop off and pick up times realistic. Don’t make it too hard for yourself – a sleepover can seem like a long party so don’t start too early in the day and have the kids picked up by around 10am the next day so you can get your house back.

Low parental involvement activities

Sleepovers are much more free range affairs than your normal birthday party. You do have to plan some boredom busters though just in case. Some suggestions are having a dance/disco room – this has the advantage of helping wear out the kids so they’ll sleep. Set up a photo booth with some props from the dress up box or print some from our Etsy shop. Movies are always a winner. Karaoke or Sing Star will keep them happy for hours. To avoid your house looking like a bomb site when everyone’s left and to keep focus on the activites you’ve planned try putting other toys away in an off limits room.

Best of luck!

Printables for the Popcorn and PJs party are available from our Etsy shop.